Node-RED is an open source Node.js programming tool that enables you to set up some fairly advanced programs and workflows without writing any code. It has an extensive library of “nodes” you can use to automate actions based on events such as an incoming text or email, a time of day, or (in our case) an incoming message from an MQTT broker.
Node-RED might already be installed on your Raspberry Pi OS, but older versions can be terribly out of date and insecure. To install the newest versions of Node.js, npm, and Node-RED all at once, type the following into your terminal on the Raspberry Pi and hit Enter:
bash <(curl -sL https://raw.githubusercontent.com/node-red/linux-installers/master/deb/update-nodejs-and-nodered)
You can find more information on nodered.
Once you have Node-RED installed, start up the service by running the following command in the terminal:
node-red-start
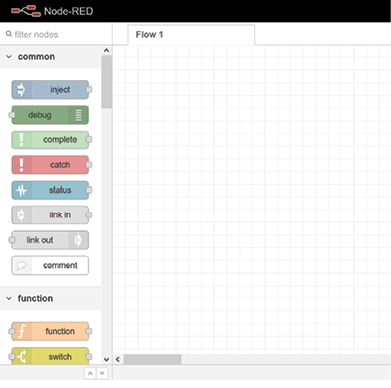
Once the service is up and running, you can either go to 127.0.0.1:1880 in a browser on your Raspberry Pi, or if you’re on the same internal network as your Pi, you can open a browser and type in the Pi’s IP address on port 1880 to go to the Node-RED Setup screen. So, for example, if my Raspberry Pi has an internal IP address of 192.168.0.100, I would go to http://192.168.0.100:1880 to navigate to the setup screen.
SETTING UP AN MQTT BROKER
MQTT (Message Queueing Telemetry Transport) is a popular messaging protocol that uses a publisher/subscriber model for sending machine-to-machine messages on spotty connections. The main thing I like about it is the amount of documentation out there about it, and that it is very lightweight on data usage. I have it running on my phone 24/7, and it barely uses 1 megabyte of my 4G data per month!
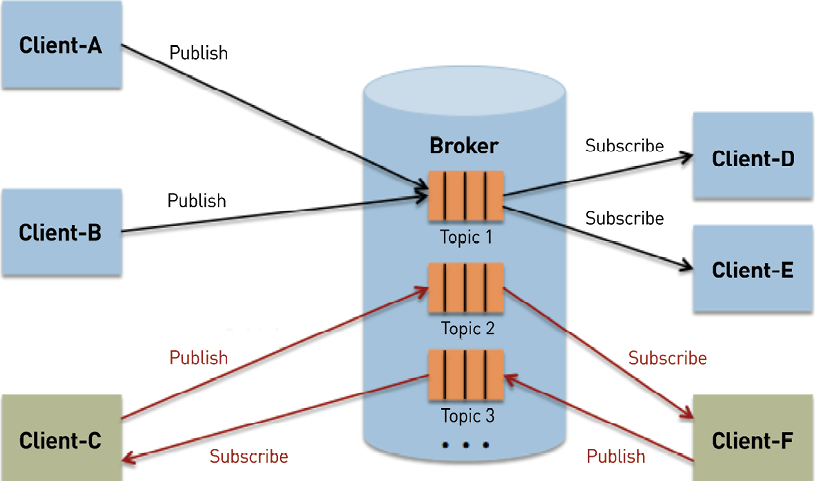
Before you can send data via MQTT, you need to set up an MQTT broker to route messages. An MQTT broker acts as the server that you either publish messages to, or subscribe to, in that you receive any messages from a given publisher. MQTT clients (like the phone app you’ll install to send GPS coordinates) publish their messages to topics — different channels on the broker to which a client can publish or subscribe.

There are several different options for setting up an MQTT broker:
• Self Hosted: You set up MQTT broker software on a server you control and operate; Mosquitto is a popular option.
• Paid Service: You pay for an MQTT connection where you control the topics and messages you publish/subscribe to; CloudMQTT is one example.
• Open Broker: You post to a free and open public MQTT broker such as iot.eclipse.org. Great for testing but not secure!
Each type has its benefits and downsides.
Open Broker
The first category is a public, open broker that anybody with an MQTT client can use to publish messages and subscribe to topics.
WARNING: Open brokers are not secure. They’re very nice for testing that your Node-RED flow is set up correctly, but should not be used as a normal broker for this project! You’re posting your personal GPS coordinates and waypoints, which is not the sort of thing you want to post to a broker that anyone can access.
One of the most popular open brokers is test.mosquitto.org. For testing my connection to the broker, I either download an MQTT client or use a web MQTT client like MQTT Lens. Steve’s Internet Guide has a great write-up on how to download and use it and generally has a ton of fantastic information related to MQTT and Node-RED. I used this site quite a bit while getting familiar with this protocol!
Once you’ve tested connecting to an open broker with an MQTT client, you can then test setting up the broker in Node-RED and make sure you can subscribe to a topic within Node-RED (I’ll say more about that a little further down in this guide).
Paid Service
You pay a subscription fee in order to send and receive messages via MQTT. The downside is obviously you have to pay a fee, though for the size of this project (using only 1–4 clients, a single broker, and a limited amount of messages), you should be able to use the lowest-cost option in almost any paid MQTT service I’ve seen yet.
To demonstrate this setup, I’m going to use CloudMQTT as the paid service. Their current cheapest plan ($5 a month) is more than enough to handle the amount of users and messages we’ll be setting up!
To use CloudMQTT, you’ll have to create an instance and select a payment plan. Once you name your instance, you can create a new user and assign that user an access control list (ACL).
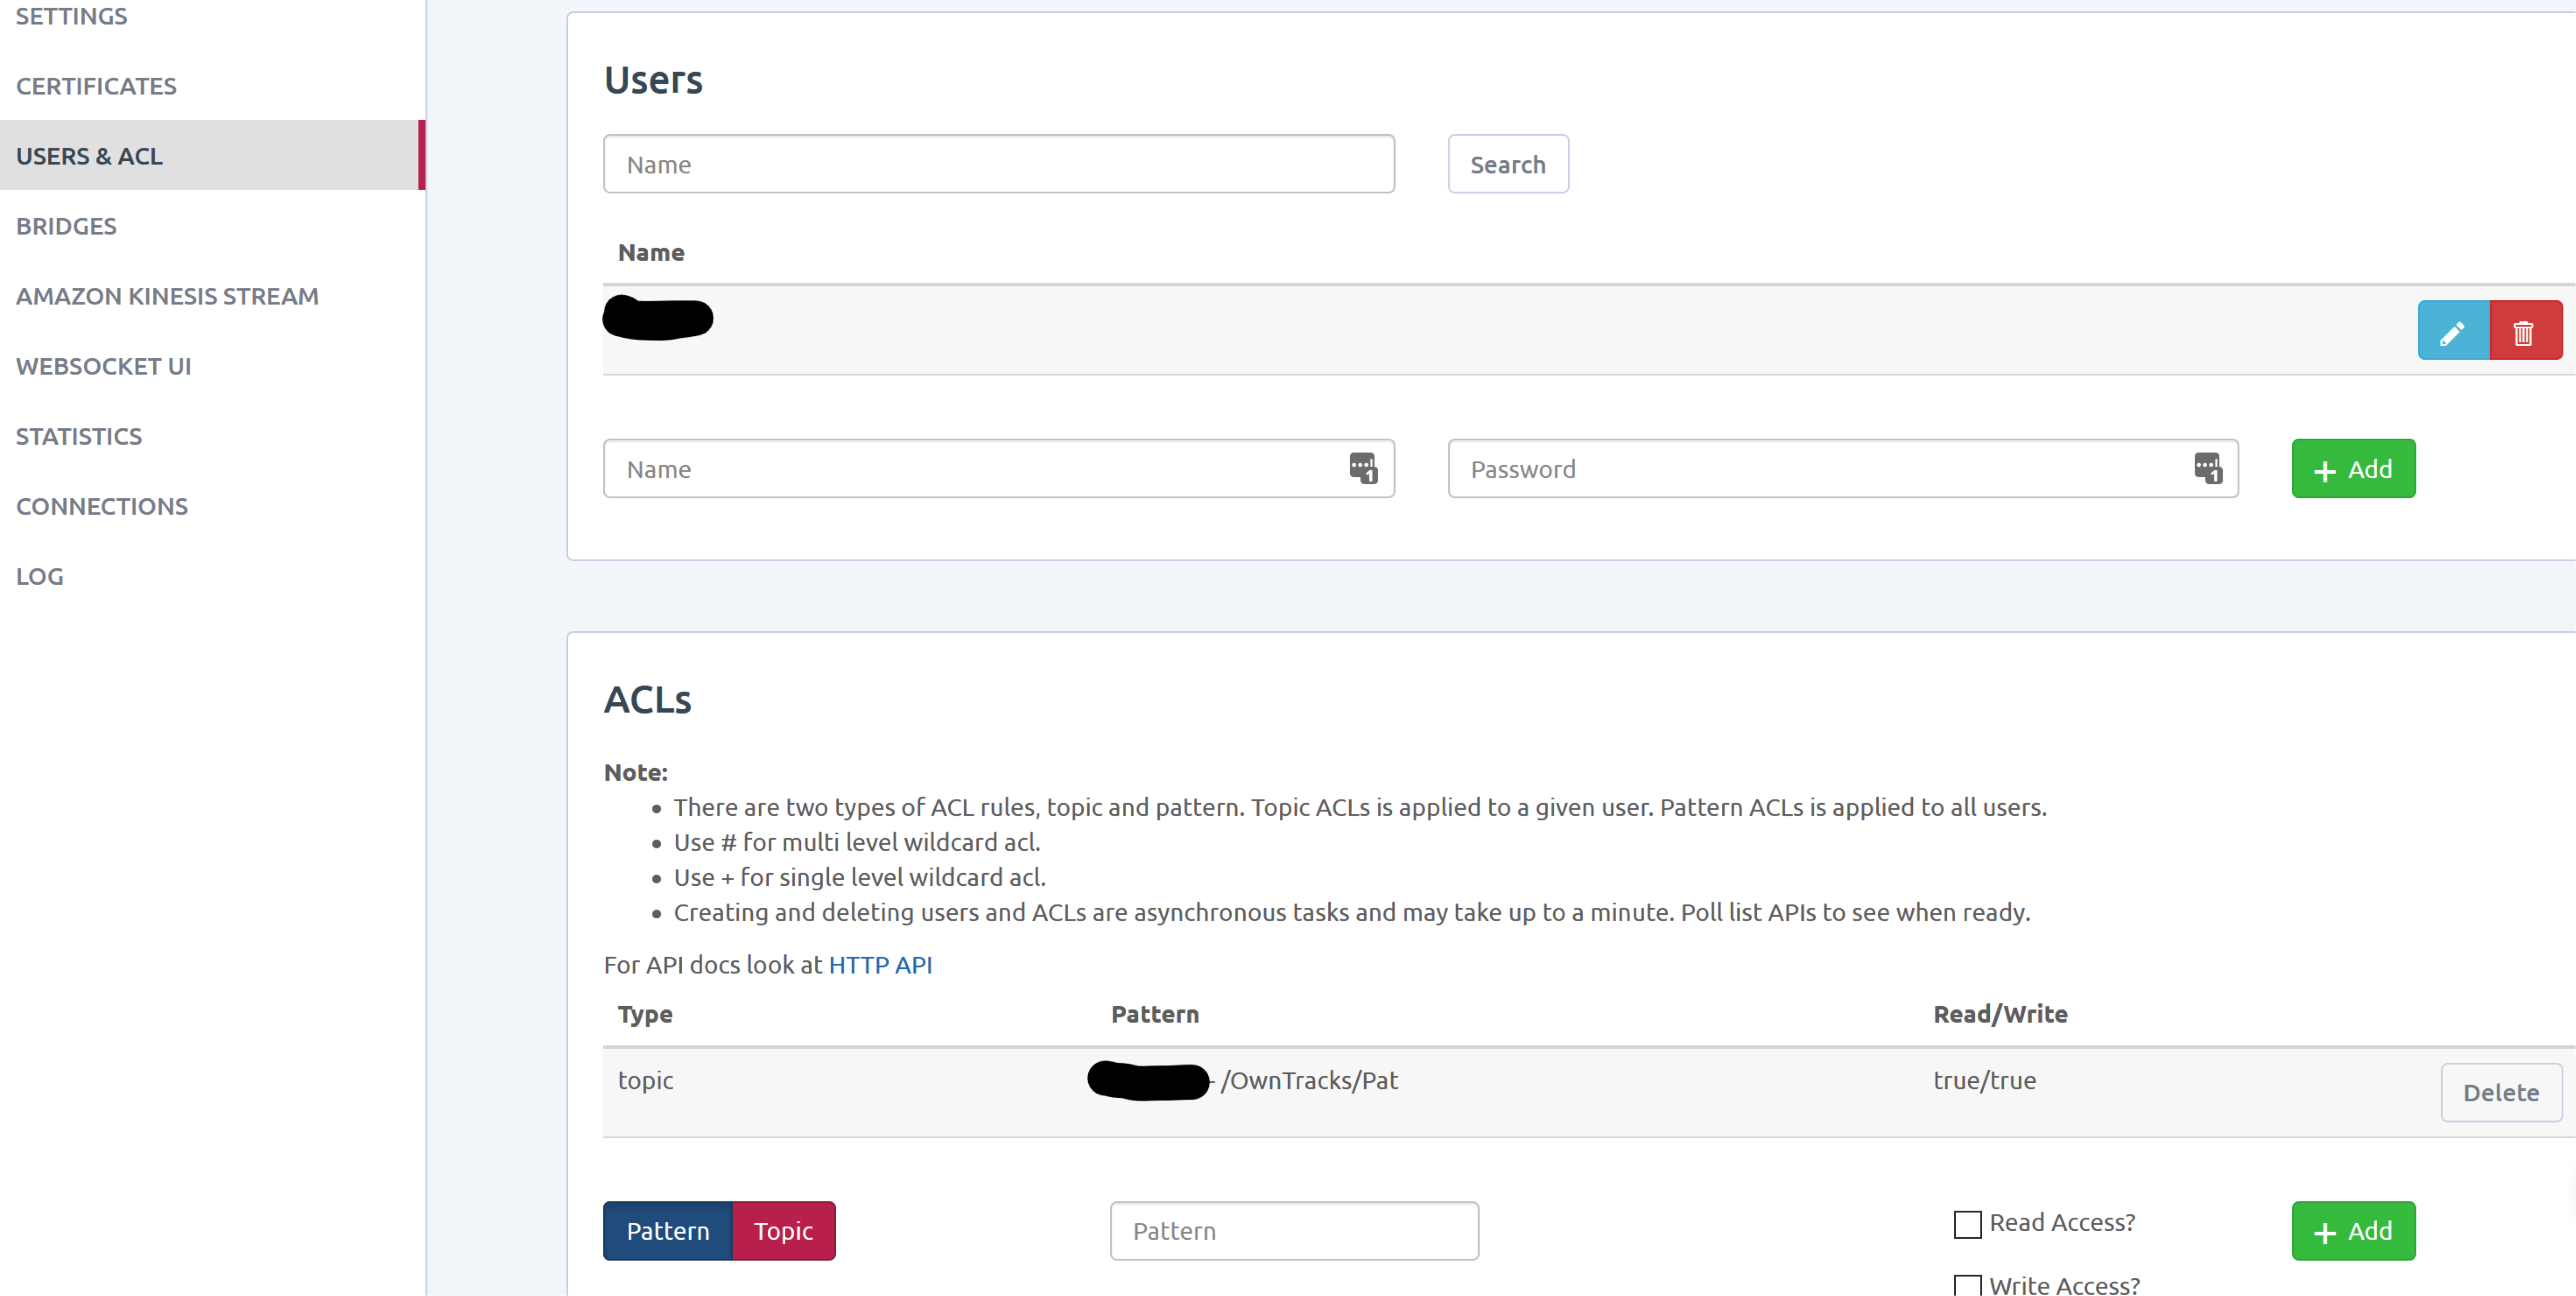
In the image above, I created a user (blacked out the username) and assigned that user to the MQTT topic /OwnTracks/Pat. Since there aren’t any other ACLs associated with this user, that means this user account can only publish and subscribe to the topic /OwnTracks/Pat/. You’ll have to create at least one account that you’ll eventually use to publish messages from your phone, and then you’ll need one account (could be the same account) for the Raspberry Pi to subscribe to the MQTT topic you created in order to receive the messages from your phone.
After you create the user and ACL, you can go to the Details panel of your CloudMQTT account, which should give you all the connection information you’ll need, including the server address, port to connect with, and additional Client information. You’ll want to keep this information handy when setting up your phone to connect to the broker, and when setting up the Raspberry Pi to connect to the broker.
Self Hosted
Probably the most popular software for hosting your own MQTT broker is the open source broker Mosquitto, a package maintained and hosted by the Eclipse Foundation. There are a plethora of guides and tutorials on setting up your own Mosquitto MQTT broker. This one from Digital Ocean is probably my favorite, since it also includes instructions on setting up free SSL certificates (so that you can encrypt your connections) through Let’s Encrypt.
After you set up the MQTT broker that works for you, you’ll want to create an MQTT user for each person who’ll be represented on the location clock, and one for the Raspberry Pi to use as well. MQTT doesn’t require authentication for publishing or subscribing out of the box, but it’s very easy to set up authenticated topics so that only authenticated users can publish or subscribe to specific topics.
Keep all this user login information handy — you’ll use it again when you’re configuring OwnTracks and Node-RED to connect to the MQTT broker.